Custom Navigation Transitions, Part IV: An Interactive Pop Transition
This is the fourth and final post in a series on navigation transitions, one of the trickier parts of building a great iOS app. In the first post, we simplified the cast-of-characters in the API. In the second, we built a simple, self-contained modal transition. In the third, we built a more-complex push/pop animation. Today, we’ll tackle the most-challenging one of all: an interactive navigation transition, by implementing the drag-to-dismiss gesture from the Photos app.
Every year at WWDC, there’s a talk on building excellent, interactive animations. Maybe it’s “Building Interruptible and Responsive Interactions” (2014), “Advanced Animations with UIKit” (2017), or “Designing Fluid Interfaces” (2018). These sessions are all excellent — and they emphasize the importance of direct manipulation. Rather than tapping a back button, you ought to be able to flick, drag, pan, and pinch to control what’s onscreen.
Here’s the Nielsen Norman Group’s definition of direct manipulation (emphasis mine):
“Direct manipulation is an interaction style in which the objects of interest in the UI are visible and can be acted upon via physical, reversible, incremental actions that receive immediate feedback.”
Today, we’re going to build exactly that: the drag-to-dismiss transition from Locket Photos, which mimics the same interaction from Apple’s Photos app.
You should also download the source code for this series.
This post is a culmination of the others in this series. To build it, we’ll not only need to support the many custom navigation APIs that we’ve previously discussed — we also need to drive the interaction ourselves, by calculating progress from a gesture recognizer, reporting it to the system, and cleaning up when we’re done.1
Despite the difficulty, these gesture-driven navigation transitions are completely worth it. They take your app from lifeless paperwork to feeling like a playful, crafted product, and that can make all the difference in the perceived quality of your app.
So: let’s dig in!
How an interactive animation works
Let’s start by talking about the order-of-operations for getting an interactive navigation transition to occur:2
- The pan-gesture on our photo-detail screen starts, so we call
self.navigationController?.popViewController(animated: true). - In our navigation controller, the system asks if we’ve got an animated transition for the current navigation operation. We’ll create and return our interactive animation here.
- The system then tells our interactive animation to begin (via
startInteractiveTransition) — and now autopilot is off, and we get to drive the animation ourselves. We’ll use the pan gesture to drive the percentage-complete for the animation, and decide whether to update, cancel, or finish the transition. - When the transition is over, it’s either complete, or it’s been cancelled. We’ll animate to the end-state, and notify the system that we’re all done.
Composing the animation
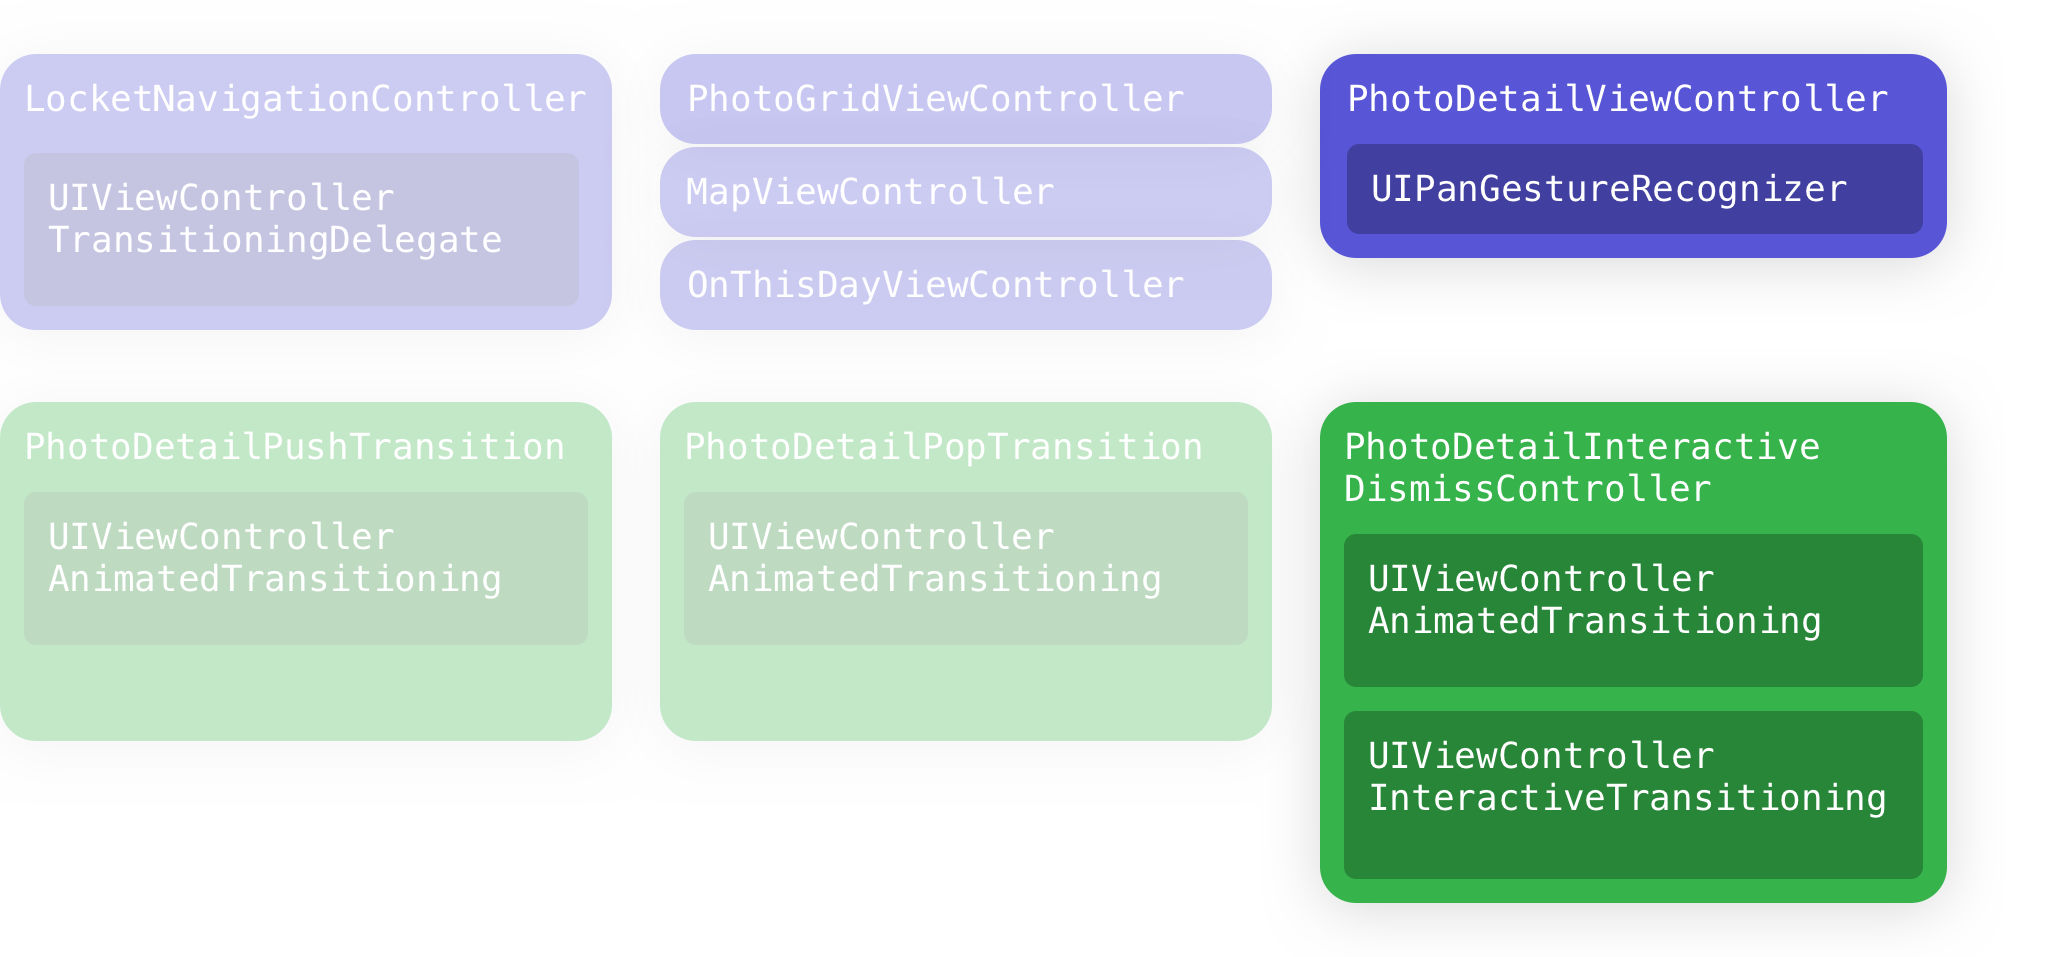
In our last post, we built out non-interactive push and pop animations — so today, we’re going to do two things: add a UIPanGestureRecognizer to our photo-detail screen, and build a new PhotoDetailInteractiveDismissTransition to drive the animation:
We’ve already built a few UIViewControllerAnimatedTransitioning animations with UIViewPropertyAnimator, so we’re going to find that we’re able to reuse those skills today. Yay!
Designing the animation
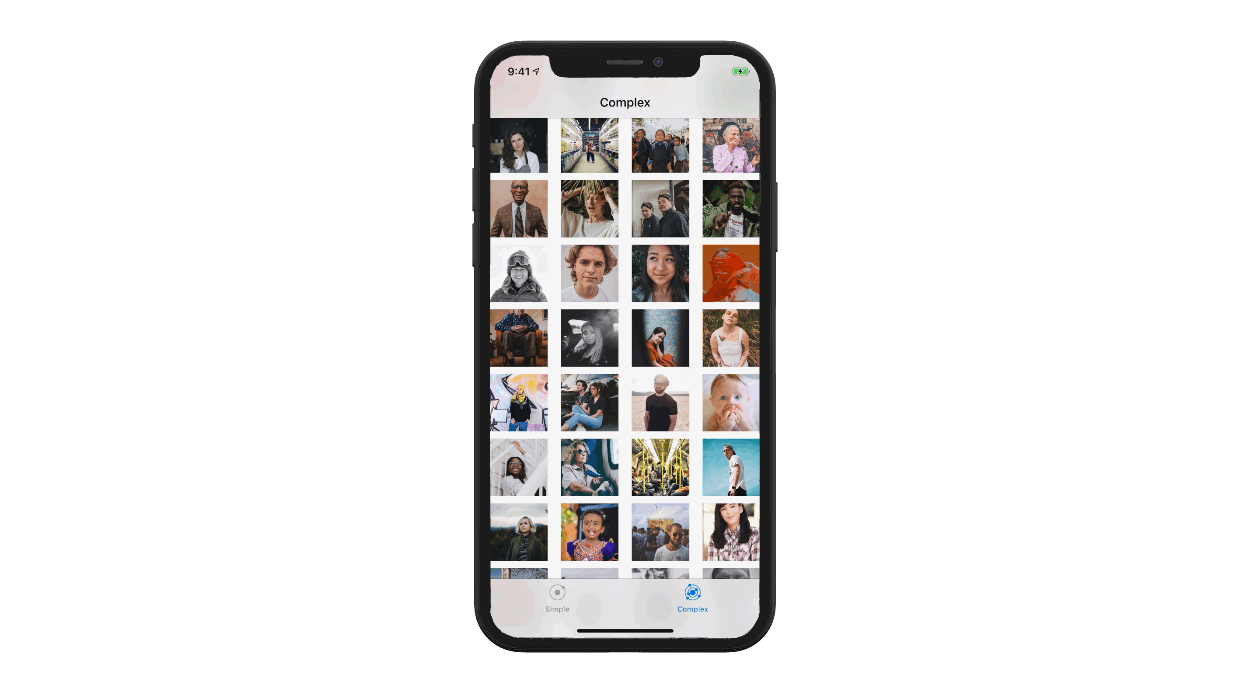
For Locket Photos, I wanted to closely-mimic the drag-to-dismiss gesture from the Photos app. Instead of having to tap the back button, you can drag down on the image to pop back from the photo-detail screen.
Let’s look at our fish and see some of the details in this interactive transition.
- Once interactive, you can drag the photo around anywhere on the screen: it’s not on a vertical rail, it follows your finger. This is direct manipulation, and it feels great.
- During the gesture, we need some affordances to imply what will happen if the user lifts their finger. We’ll scale the image down, and decrease the opacity of the photo-detail screen.
- If the user drags above the start point, that cancels the gesture — so we’d want the image at full-scale and the background to be opaque.
- We don’t want to over-shrink the image, so after a certain drag-distance, we’ll want to just have the image shrunk and the background transparent, until the user completes the gesture.
- When the user lets go, we need to figure out whether to cancel or complete the transition, and animate to the end state.
- The tab bar shows and hides during the transition, but we already wrote the code for this last time!
- We need it to feel great in-hand, so I recommend using SwiftTweaks to dial-in the animation timings and other thresholds.
Building it out in code
It’s all going to start with a pan-gesture in our photo-detail view controller:
// PhotoDetailViewController.swift

// MARK: Drag-to-dismiss

private let dismissPanGesture = UIPanGestureRecognizer()
public var isInteractivelyDismissing: Bool = false

// By holding this as a property, we can then notify it about the current
// state of the pan-gesture as the user moves their finger around.
public weak var transitionController: PhotoDetailInteractiveDismissTransition? = nil

// We'll call this in viewDidLoad to set up the gesture
private func configureDismissGesture() {
    self.view.addGestureRecognizer(self.dismissPanGesture)
    self.dismissPanGesture.addTarget(self, action: #selector(dismissPanGestureDidChange(_:)))
}

@objc private func dismissPanGestureDidChange(_ gesture: UIPanGestureRecognizer) {
    // Decide whether we're interactively-dismissing, and notify our navigation controller.
    switch gesture.state {
    case .began:
	    self.isInteractivelyDismissing = true
	    self.navigationController?.popViewController(animated: true)
    case .cancelled, .failed, .ended:
	    self.isInteractivelyDismissing = false
    case .changed, .possible:
	    break
    @unknown default:
	    break
    }

    // ...and here's where we pass up the current-state of our gesture
    // to our `PhotoDetailInteractiveDismissTransition`:
    self.transitionController?.didPanWith(gestureRecognizer: gesture)
}
When the pan gesture fires, it calls popViewController(animated:), so the system will ask our navigation controller if it has an animated transition. We do! We just need to decide if it’s interactive or not — so we’ll check if the pan-gesture is active on our photo-detail screen to decide whether to return the interactive or non-interactive pop animation:
// LocketNavigationController.swift

if photoDetailVC.isInteractivelyDismissing {
    result = PhotoDetailInteractiveDismissTransition(fromDelegate: photoDetailVC, toDelegate: toVC)
} else {
    result = PhotoDetailPopTransition(toDelegate: toVC, fromPhotoDetailVC: photoDetailVC)
}

self.currentAnimationTransition = result
return result
Next, the system is going to ask our navigation controller if it has an interactive animated transition. (I know, it feels a little repetitive, right?) We held on to our currentAnimationTransition for a reason: to return it here:
// LocketNavigationController.swift

public func navigationController(
    _ navigationController: UINavigationController,
    interactionControllerFor animationController: UIViewControllerAnimatedTransitioning
) -> UIViewControllerInteractiveTransitioning? {
    return self.currentAnimationTransition as? UIViewControllerInteractiveTransitioning
}
Now we hop over to our PhotoDetailInteractiveDismissTransition. Like the animated transitions we built last time, it uses the PhotoDetailTransitionAnimatorDelegate to coordinate with the photo-detail and photo-grid screens. It implements the functions for UIViewControllerAnimatedTransitioning and UIViewControllerInteractiveTransitioning. Also, we have a “update progress” function that we’ll use with our pan-gesture to drive the percentage-complete for the transition.
Let’s start with some pseudocode, so you can see a high-altitude view of what’s going on:
public class PhotoDetailInteractiveDismissTransition: NSObject {
    // Like the other transitions we've made,
    // this has an imageview that we animate onscreen.
    fileprivate let transitionImageView: UIImageView = // ...

    /// The from- and to- viewControllers can conform to the protocol in order to get updates and vend snapshotViews
	fileprivate let fromDelegate: PhotoDetailTransitionAnimatorDelegate
	fileprivate weak var toDelegate: PhotoDetailTransitionAnimatorDelegate?

	/// The background animation is the "photo-detail background opacity goes to zero"
	fileprivate var backgroundAnimation: UIViewPropertyAnimator? = nil

  	/// Called by the photo-detail screen, this function updates the state of
	/// the interactive transition, based on the state of the gesture.
	func didPanWith(gestureRecognizer: UIPanGestureRecognizer) {
        // TODO update the transition-image, etc based on the gesture's state.
    }

    /// If the gesture recognizer is completed/cancelled/failed,
    /// we call this method to animate to our end-state and wrap things up.
    private func completeTransition(didCancel: Bool) {
        // TODO animate to the cancelled or completed state.
    }
}

extension PhotoDetailInteractiveDismissTransition: UIViewControllerAnimatedTransitioning {
	public func transitionDuration(using transitionContext: UIViewControllerContextTransitioning?) -> TimeInterval {
        // You can return most-anything you want here;
        // even though this function is called by the system,
        // it doesn't seem to affect anything, because we're going to drive
        // the animation ourselves.
		return 0.3
	}

	public func animateTransition(using transitionContext: UIViewControllerContextTransitioning) {
		// Never called; this is always an interactive transition.
		fatalError()
	}
}

extension PhotoDetailInteractiveDismissTransition: UIViewControllerInteractiveTransitioning {
    // The system will call this function once at the very start;
    // it's our chance to take over and start driving the transition.
    public func startInteractiveTransition(_ transitionContext: UIViewControllerContextTransitioning) {
        // TODO implement
    }
}
…and that’s it! Let’s go fill in those TODOs.
Filling in the animation’s details
Let’s follow the lifecycle of the transition — so we’ll begin in startInteractiveTransition(_). We’re going to pick apart some of the properties from the transitionContext, notify our delegates that the animation has started (so they can hide their imageviews), and set up the view hierarchy for the transition.
extension PhotoDetailInteractiveDismissTransition: UIViewControllerInteractiveTransitioning {
    // The system will call this function once at the very start;
    // it's our chance to take over and start driving the transition.
    public func startInteractiveTransition(_ transitionContext: UIViewControllerContextTransitioning) {
		self.transitionContext = transitionContext

		let containerView = transitionContext.containerView

		guard
			let fromView = transitionContext.view(forKey: .from),
			let toView = transitionContext.view(forKey: .to),
			let fromImageFrame = fromDelegate.imageFrame(),
			let fromImage = fromDelegate.referenceImage(),
			let fromVC = transitionContext.viewController(forKey: .from) as? PhotoDetailViewController,
			let toVC = transitionContext.viewController(forKey: .to)
		else {
			fatalError()
		}

		self.fromVC = fromVC
		self.toVC = toVC
		fromVC.transitionController = self

        // Notify our delegates that the transition has begun:
		fromDelegate.transitionWillStart()
		toDelegate?.transitionWillStart()
		self.fromReferenceImageViewFrame = fromImageFrame

        // Decide where the image should move during the transition.
		// NOTE: We'll replace this with a better one during the transition,
		// because the collectionview on the parent screen needs a chance to re-layout.
		self.toReferenceImageViewFrame = PhotoDetailPopTransition.defaultOffscreenFrameForDismissal(
			transitionImageSize: fromImageFrame.size,
			screenHeight: fromView.bounds.height
		)

        // Build the view-hierarchy for the animation
		containerView.addSubview(toView)
		containerView.addSubview(fromView)
		containerView.addSubview(transitionImageView)

		transitionImageView.image = fromImage
		transitionImageView.frame = fromImageFrame

        // Create the "photo-detail background fades away" animation
		// NOTE: The duration and damping ratio here don't matter!
		// This animation is only programmatically adjusted in the drag state,
		// and then the duration is altered in the completion state.
		self.backgroundAnimation = UIViewPropertyAnimator(duration: 1, dampingRatio: 1, animations: {
			if self.toDelegate == nil {
                // This occurs in Locket if you tap a single image on the map.
				fromView.frame.origin.x = containerView.frame.maxX
				self.transitionImageView.alpha = 0.4
			} else {
				fromView.alpha = 0
			}
		})

        // Look! Our friend, the custom-tab-bar-hiding animation, working
        // perfectly with our UIViewPropertyAnimator. Isn't that neat?
		toVC.locketTabBarController?.setTabBar(hidden: false, animated: true, alongside: self.backgroundAnimation!)
	}
}
Phew! Ok, after the system calls startInteractiveTransition, we’re in control of the transition. Our pan-gesture will continue to send updates to didPanWith(gestureRecognizer:), so let’s hop up there: We’ll inspect the gesture, and decide whether to update progress, cancel the transition, or complete it.
First, we’re going to need to decide how the pan gesture’s translation maps to a percentage-complete:
// PhotoDetailInteractiveDismissTransition.swift

/// For a given vertical offset, what's the percentage complete for the transition?
/// e.g. -100pts -> 0%, 0pts -> 0%, 20pts -> 10%, 200pts -> 100%, 400pts -> 100%
func percentageComplete(forVerticalDrag verticalDrag: CGFloat) -> CGFloat {
    let maximumDelta = CGFloat(200)
    return CGFloat.scaleAndShift(
        value: verticalDrag,
        inRange: (min: CGFloat(0), max: maximumDelta)
    )
}

/// The transition image scales down from 100% to a minimum of 68%,
/// based on the percentage-complete of the gesture.
func transitionImageScaleFor(percentageComplete: CGFloat) -> CGFloat {
    let minScale = CGFloat(0.68)
    let result = 1 - (1 - minScale) * percentageComplete
    return result
}
That CGFloat function is a nifty way to convert the drag-distance into a value between 0 and 1. (This is one of my “You Deserve Nice Things” bits that I use often in projects.)
public extension CGFloat {
	/// Returns the value, scaled-and-shifted to the targetRange.
	/// If no target range is provided, we assume the unit range (0, 1)
	static func scaleAndShift(
		value: CGFloat,
		inRange: (min: CGFloat, max: CGFloat),
		toRange: (min: CGFloat, max: CGFloat) = (min: 0.0, max: 1.0)
		) -> CGFloat {
		assert(inRange.max > inRange.min)
		assert(toRange.max > toRange.min)

		if value < inRange.min {
			return toRange.min
		} else if value > inRange.max {
			return toRange.max
		} else {
			let ratio = (value - inRange.min) / (inRange.max - inRange.min)
			return toRange.min + ratio * (toRange.max - toRange.min)
		}
	}
}
Cool. Let’s hop in and implement the guts of our didPanWith(gestureRecognizer:) function from earlier:
/// Called by the photo-detail screen, this function updates the state of
/// the interactive transition, based on the state of the gesture.
func didPanWith(gestureRecognizer: UIPanGestureRecognizer) {
    let transitionContext = self.transitionContext!
    let transitionImageView = self.transitionImageView

	// For a given vertical-drag, we calculate our percentage complete
	// and how shrunk-down the transition-image should be.
    let translation = gestureRecognizer.translation(in: nil)
    let translationVertical = translation.y
    let percentageComplete = self.percentageComplete(forVerticalDrag: translationVertical)
    let transitionImageScale = transitionImageScaleFor(percentageComplete: percentageComplete)

    // Now, we inspect the gesture's state, and decide whether to update/cancel/complete.
    switch gestureRecognizer.state {
    case .possible, .began:
        break
    case .cancelled, .failed:
        self.completeTransition(didCancel: true)
    case .changed:
        // Apply a transform to our imageview, to scale/translate it into place.
        transitionImageView.transform = CGAffineTransform.identity
    		.scaledBy(x: transitionImageScale, y: transitionImageScale)
    		.translatedBy(x: translation.x, y: translation.y)

        // Notify the system about the percentage-complete.
        transitionContext.updateInteractiveTransition(percentageComplete)

        // Update the background animation (yay property animators!)
        self.backgroundAnimation?.fractionComplete = percentageComplete

	case .ended:
        // Here, we decide whether to complete or cancel the transition.
        let fingerIsMovingDownwards = gestureRecognizer.velocity(in: nil).y > 0
        let transitionMadeSignificantProgress = percentageComplete > 0.1
        let shouldComplete = fingerIsMovingDownwards && transitionMadeSignificantProgress
        self.completeTransition(didCancel: !shouldComplete)
	@unknown default:
		break
	}
}
Now all we need to do is fill-in our completeTransition(didCancel:) function! This function will set up a property animator to complete or cancel the transition - and it’ll update the property animators on our tab bar and backgroundAnimation, too!
private func completeTransition(didCancel: Bool) {
    // If the gesture was cancelled, we reverse the "fade out the photo-detail background" animation.
    self.backgroundAnimation?.isReversed = didCancel

    let transitionContext = self.transitionContext!
    let backgroundAnimation = self.backgroundAnimation!

    // The cancel and complete animations have different timing values.
    // I dialed these in on-device using SwiftTweaks.
    let completionDuration: Double
    let completionDamping: CGFloat
    if didCancel {
    	completionDuration = 0.45
    	completionDamping = 0.75
    } else {
	    completionDuration = 0.37
	    completionDamping = 0.90
    }

    // The transition-image needs to animate into its final place.
    // That's either:
    // - its original spot on the photo-detail screen (if the transition was cancelled),
    // - or its place in the photo-grid (if the transition completed).
    let foregroundAnimation = UIViewPropertyAnimator(duration: completionDuration, dampingRatio: completionDamping) {

        // Reset our scale-transform on the imageview
	    self.transitionImageView.transform = CGAffineTransform.identity

	    // NOTE: It's important that we ask the toDelegate *here*,
	    // because if the device has rotated,
	    // the toDelegate needs a chance to update its layout
	    // before asking for the frame.
	    self.transitionImageView.frame = didCancel
	    	? self.fromReferenceImageViewFrame!
		    : self.toDelegate?.imageFrame() ?? self.toReferenceImageViewFrame!
    }

    // When the transition-image has moved into place, the animation completes,
    // and we close out the transition itself.
    foregroundAnimation.addCompletion { [weak self] (position) in
	    self?.transitionImageView.removeFromSuperview()
	    self?.transitionImageView.image = nil
	    self?.toDelegate?.transitionDidEnd()
	    self?.fromDelegate.transitionDidEnd()

	    if didCancel {
		    transitionContext.cancelInteractiveTransition()
	    } else {
		    transitionContext.finishInteractiveTransition()
	    }
	    transitionContext.completeTransition(!didCancel)
	    self?.transitionContext = nil
    }

    // Update the backgroundAnimation's duration to match.
    // PS: How *cool* are property-animators? I say: very. This "continue animation" bit is magic!
    let durationFactor = CGFloat(foregroundAnimation.duration / backgroundAnimation.duration)
    backgroundAnimation.continueAnimation(withTimingParameters: nil, durationFactor: durationFactor)
    foregroundAnimation.startAnimation()
}
…and you’re done!!
omg, you did it! We’ve built out a non-trivial, production-quality interactive navigation transition. Congratulations!! This was a lot of work; thanks for sticking with it.
I hope that the source code will provide a great reference for you when you’re building out these transitions yourself!
It’s been really nice to get back into writing regularly here.3 I’m going to keep this going. Follow along @devsignblog on Twitter, or subscribe to this site via RSS. Thanks for reading!
-
At first, I found it a challenge to figure out where I was meant to put that gesture recognizer — does it live in my navigation controller, or the photo-detail screen, or the transition animation? I’m happy with where I wound up, but I imagine that your choice might vary depending on your app’s architecture. ↩
-
This dance was much harder to coordinate before
UIViewPropertyAnimatorcame to town. We’re going to find it much easier to update, cancel, and complete our animation by using property animators! ↩